
If you need a spreadsheet containing detailed registration data, such as completion status, pass/fail results, and completion dates, SCORM Cloud's Reportage tool makes exporting a CSV quick and easy.
Here is how to filter your data and export the report:
Open Reportage: Log in to your SCORM Cloud account, click the History tab, and select Go To Reportage. This will open your analytics overview.
Adjust Your Date Range (if required): By default, Reportage only displays data from the last 30 days. To ensure you capture all relevant completions, go to the top-left corner of the dashboard and adjust the Date Range to cover the specific timeframe you need. (Link For More Information)
-
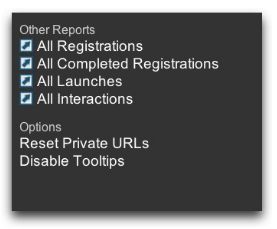
Select the Right Report: You can filter Reportage for all courses, a specific course, or a tag by using the top-level filter or widget filters. Then, locate the Other Reports section at the bottom left of Reportage and select one of the following depending on your needs:
All Registrations: A comprehensive view that includes all course registrations.
All Completed Registrations: Displays only learners who have successfully finished the content.
All Launches: Displays every instance a course was launched. (Link For More Information)
All Interactions: Displays all quiz and survey interactions, provided that data is being sent by the course. (Link For More Information).
4. Export the CSV: Once you have filtered the data to your liking and are viewing the report details, look to the top right of the page and click the Export CSV button.
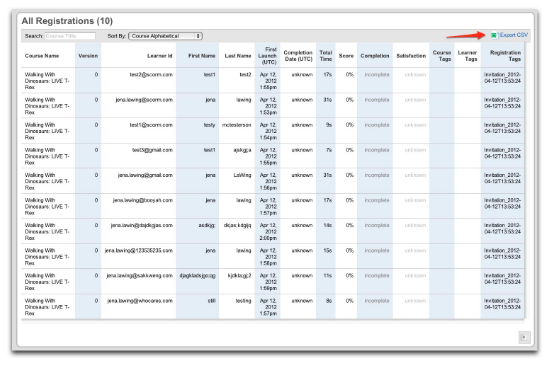
Once downloaded, you can open the CSV file in your preferred spreadsheet application to view and sort the data.
If you have any questions, please contact support@rusticisoftware.com.